Today we are going to explain how you can add a custom menu to the top of your website using beaver builder, This will help you to navigate to other pages easily, First of all you should have created some pages so you can add them to the menu,
Second, Login to your wordpress dashboard and go to Appearance then choose Menus

now, in the new page that will open, press create a new menu

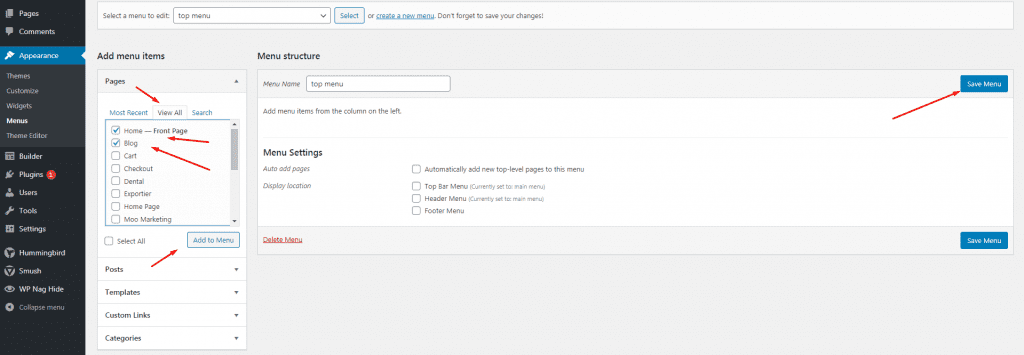
give the new menu a name and then press Create menu, after that, press view all to view all the pages you have and then tick the pages that you want to add to the menu and then press add to menu

Then press save menu to save it
— you can make a sub-menu (drop-down item) to one of your pages, please check the next screenshot

as you can see the Blog page is a sub-menu of the Home Page, because they are not in the same line, to do that, just drag the blog a little to the right to be a sub-menu
— you can also add a custom links pages to navigate not only in your website internal links but also external links outside your webpage, please check the following screenshot


now go to the page that you want to add that menu to, and edit it with the page builder,

wait for the page to load and then press the cross sign at the top right to drag the menu module to the top of the page

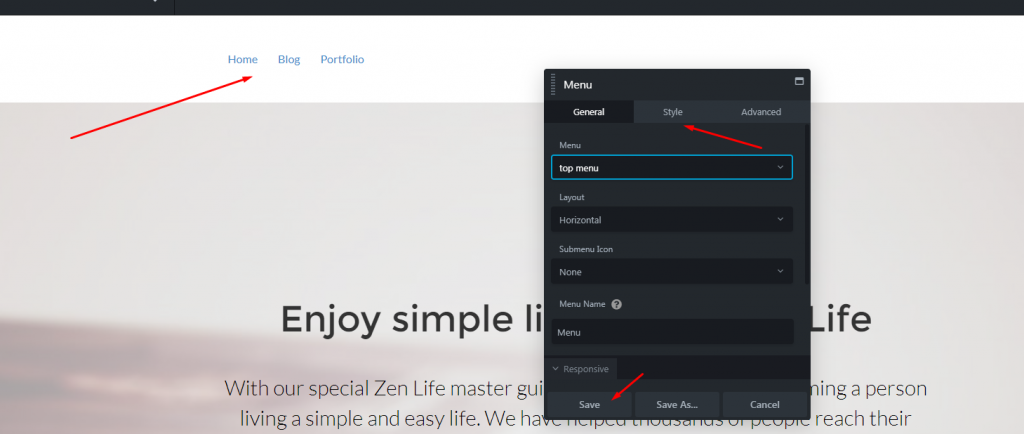
after dragging it, press it to edit and to choose the menu that you have created later, in our case its top menu

it will appear in the top of the page, you can then save or complete to style it

don’t forget to press done and publish to publish your work after you done

