Introduction:
The subscription form is one of the important things that you need to collect your customer’s or your website visitors emails, so you can use them later in your email marketing business, To connect Mailchimp to beaver builder, today we will focus on how to create a subscription form using beaver builder, then linking it to Mailchimp contact List and then we will create an autoresponder so when someone subscribes through this form, he will be added to the contact list that we created on Mailchimp.connect Mailchimp to beaver builder
Setting up Mailchimp Account:
The first thing to do is to have a Mailchimp account, you can go to this link to Sign up for a new account Create your Mailchimp Account
Fill All your information and then press Sign up
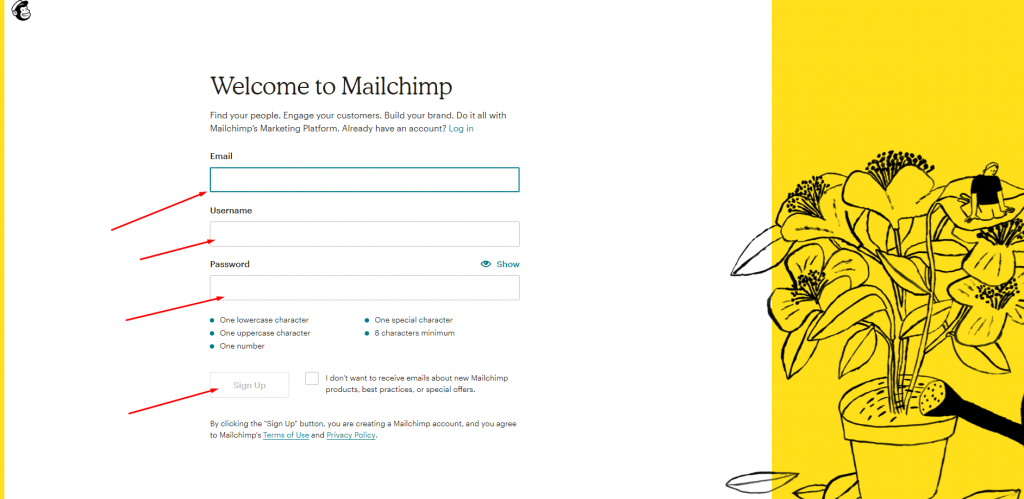
Then you should receive an activate link on your email inbox to confirm your account, After that you will be able to login.
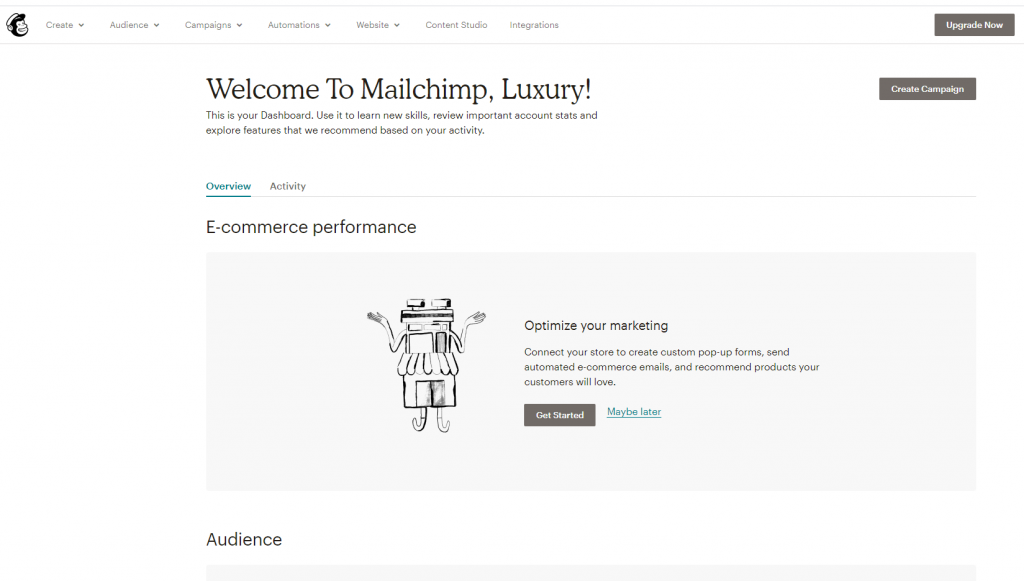
After you login, you should see a page like this
Creating Mailchimp contact list:
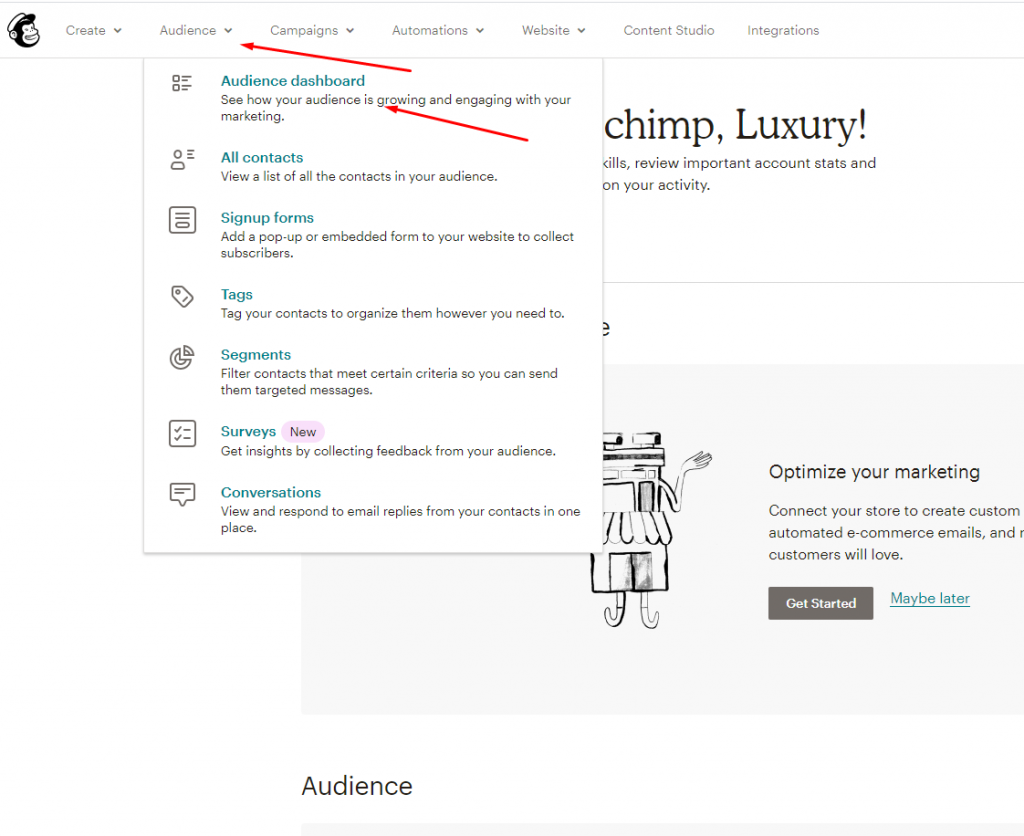
Now, we need to create a contact list in order to add our subscribed contact to, in the top left, press Audience and then choose Audience Dashboard
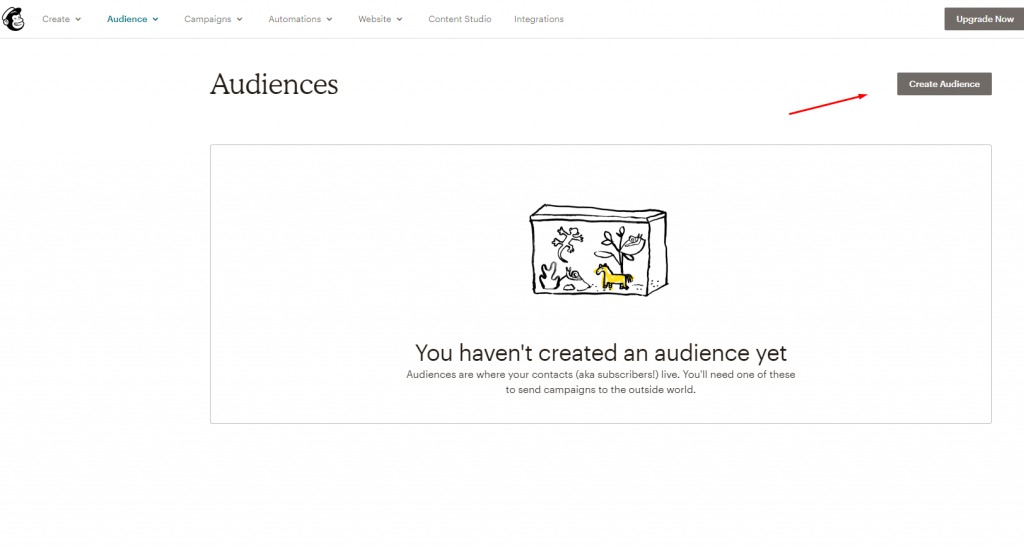
Then press Create Audience
After that you will need to fill your form Information details
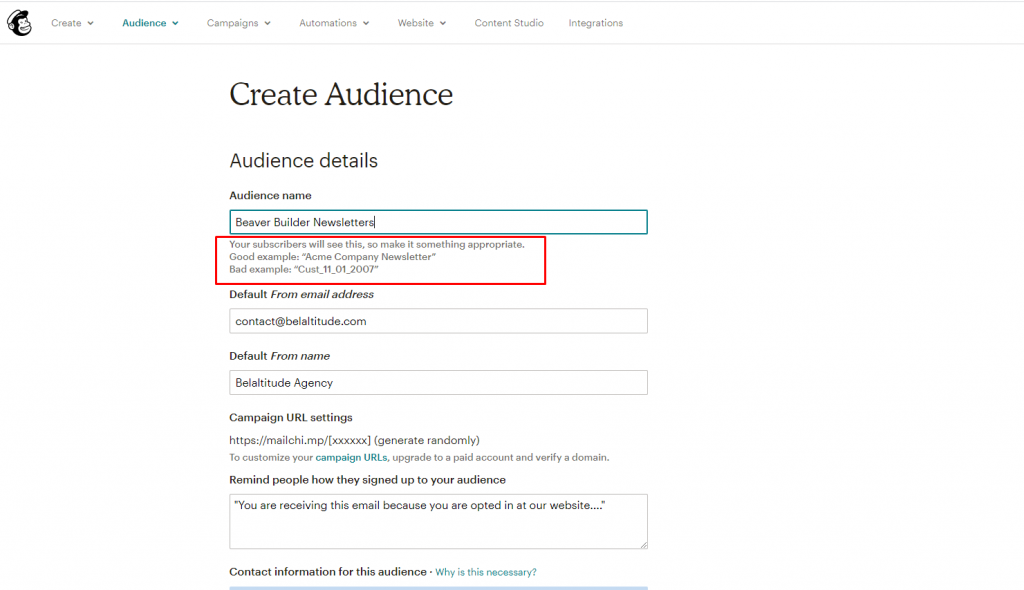
- Audience Name: this is the thing that your visitors are subscribing to see like newsletters, Tips, and Blog, so you should give it an appropriate name
- Default from email address: this your email that will appear to your subscribers to reply to
- Default from name: This should be your Agency name
- Remind People how they sign up to your Audience: you can put something like “You are receiving this email because you have opted in at our website….”.
Scroll Down and tick these two boxes
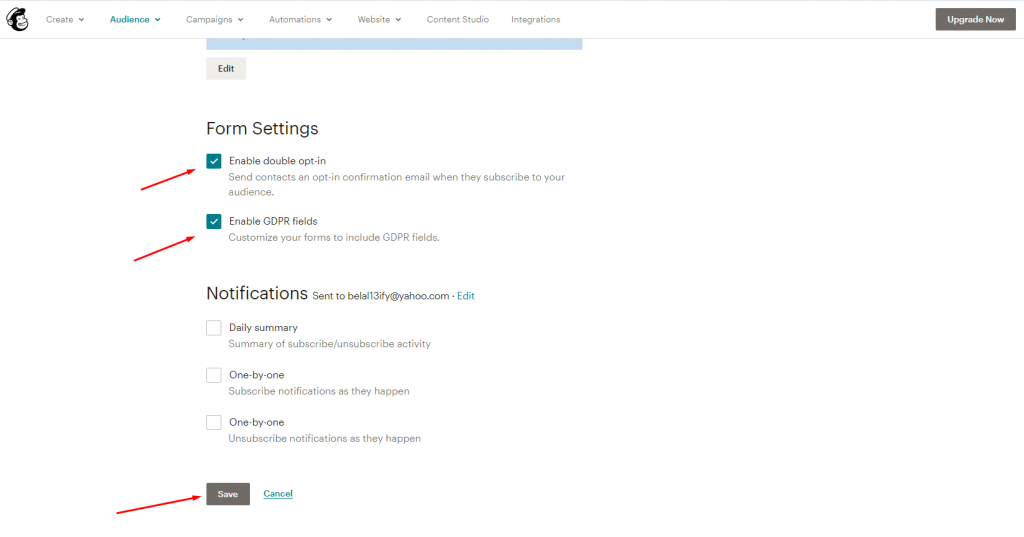
now save your list, and it should be created
Generating Mailchimp API Key:
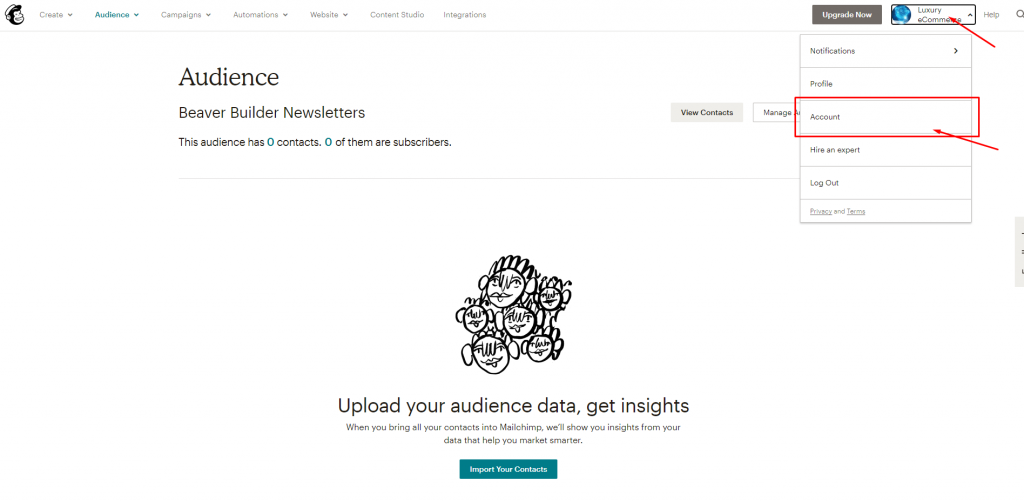
Now the next thing to do is to Generate a Mailchimp API Key so we can use it with the beaver builder subscription form, to do that press your account name at the top right and press Account
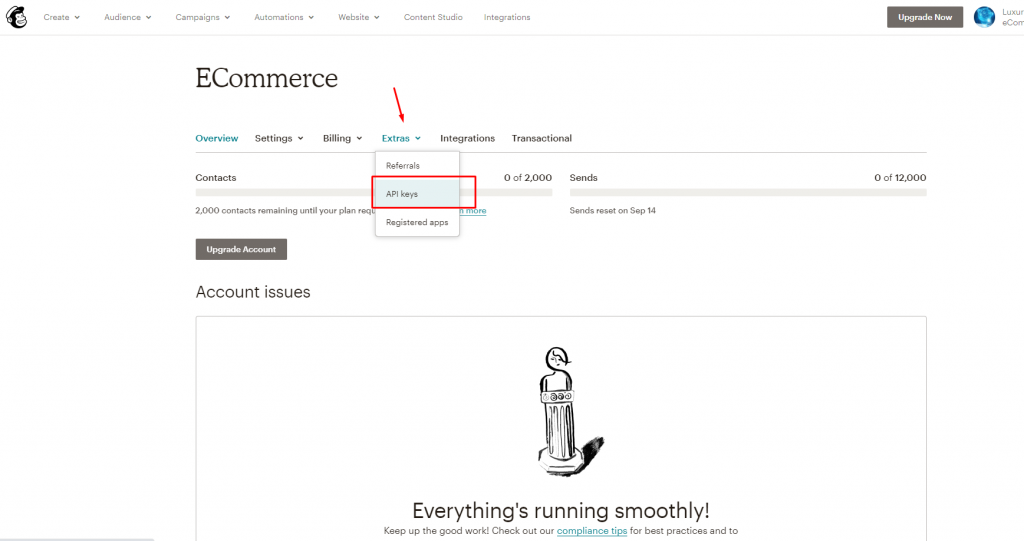
in the next page, press Extras and then choose API Keys
now you can press Create Key to create a one, you can set a label to it under Label word
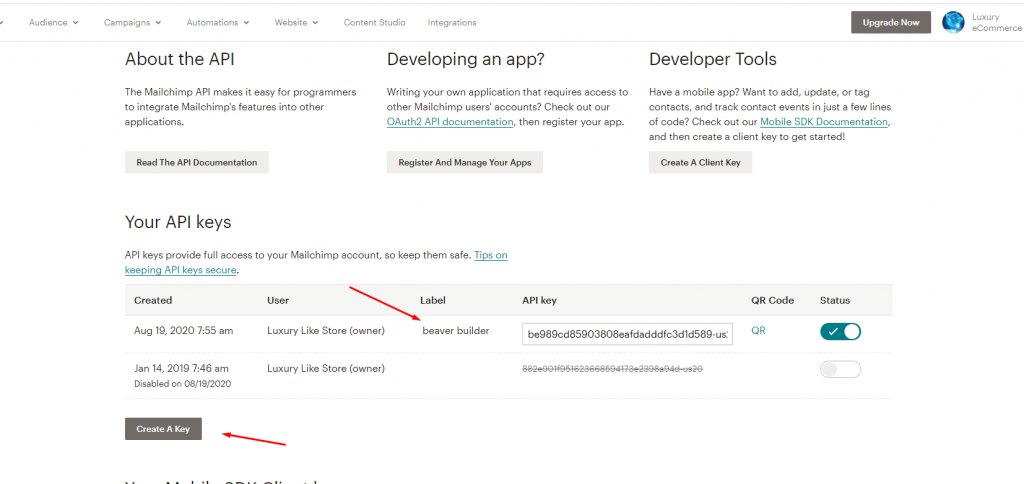
now copy this key and save it in a safe place as we will need it later.
Creating Mailchimp Campaign:
The next thing that we will do is to create a campaign that will be triggered and sent to our subscriber once he has subscribed to our list
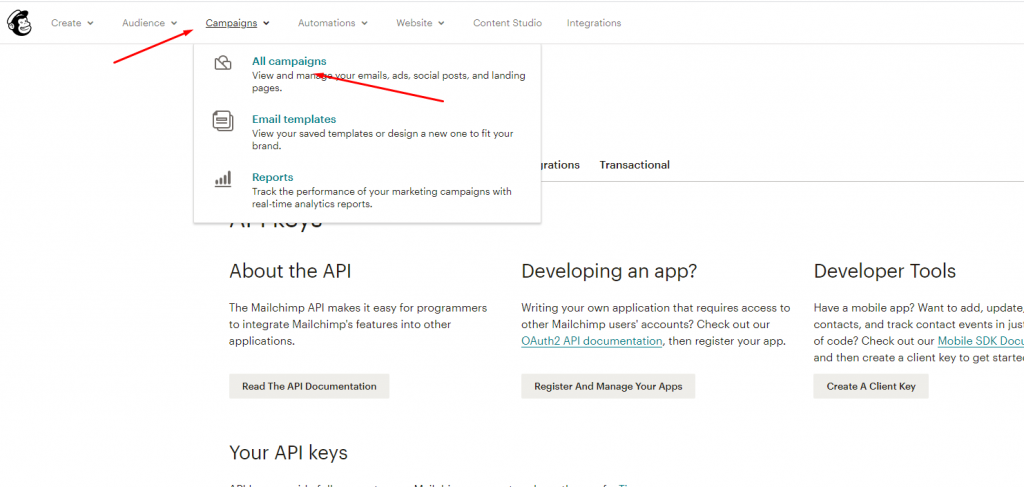
press Campaign at the top and then choose All Campaigns,
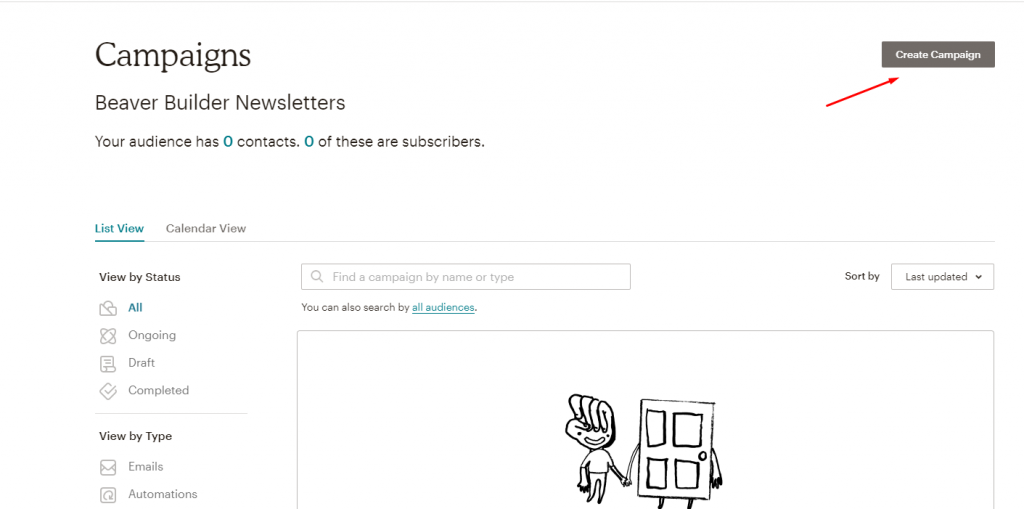
next, please create Campaign
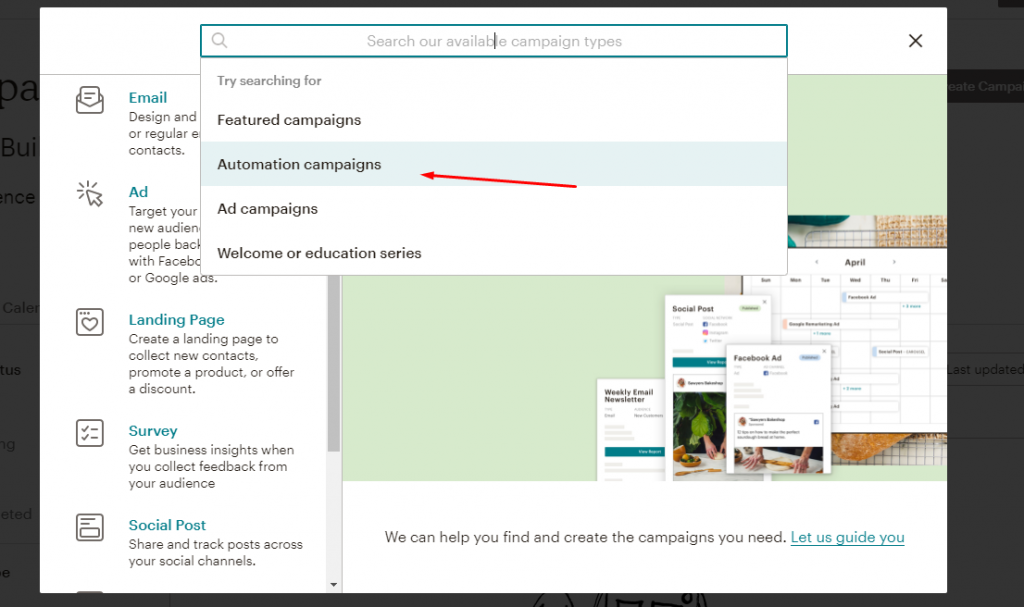
in the next page, press inside the search box and choose automation campaign,
then choose Welcome new subscribers,

This is the one we are interested in right now to autorespond to our newly subscribed member
In the next screen, Give your Campaign a name and select the audience list for it and then press begin

in the next sceen, you should see everything is verified, except the from section,
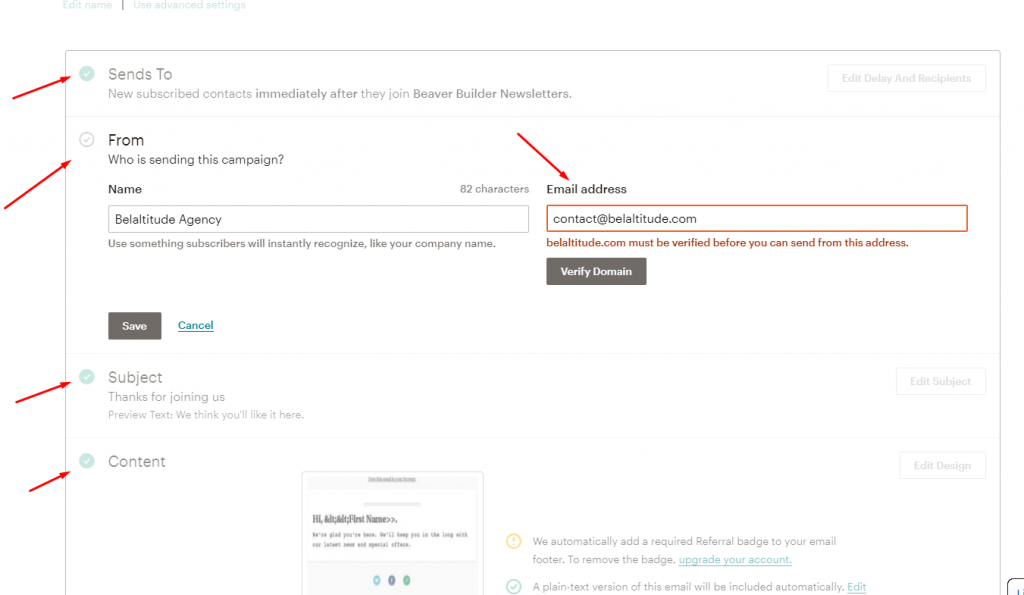
press it to verify your domain or your email for sending
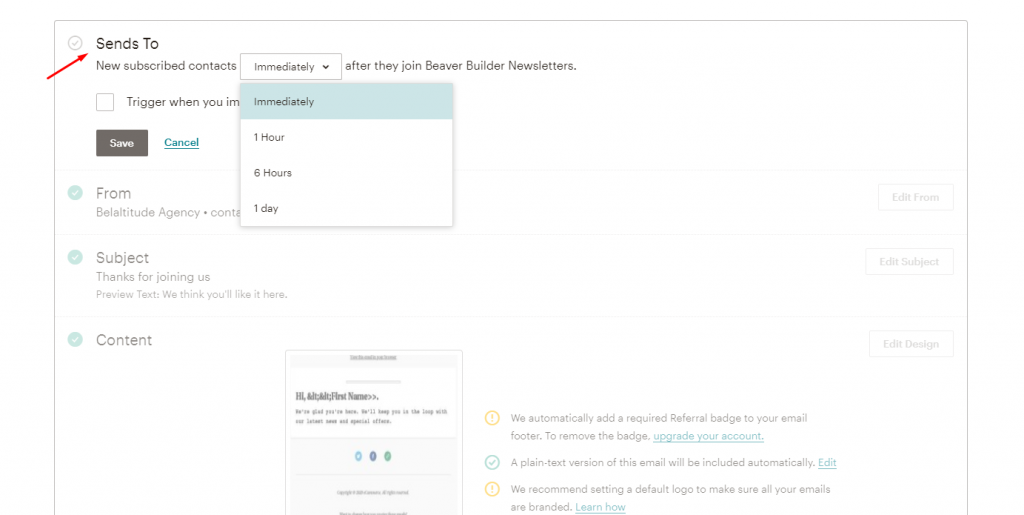
you can set the delay time from send to section to anytime you want for your autoresponder to respond when you get a new subscriber
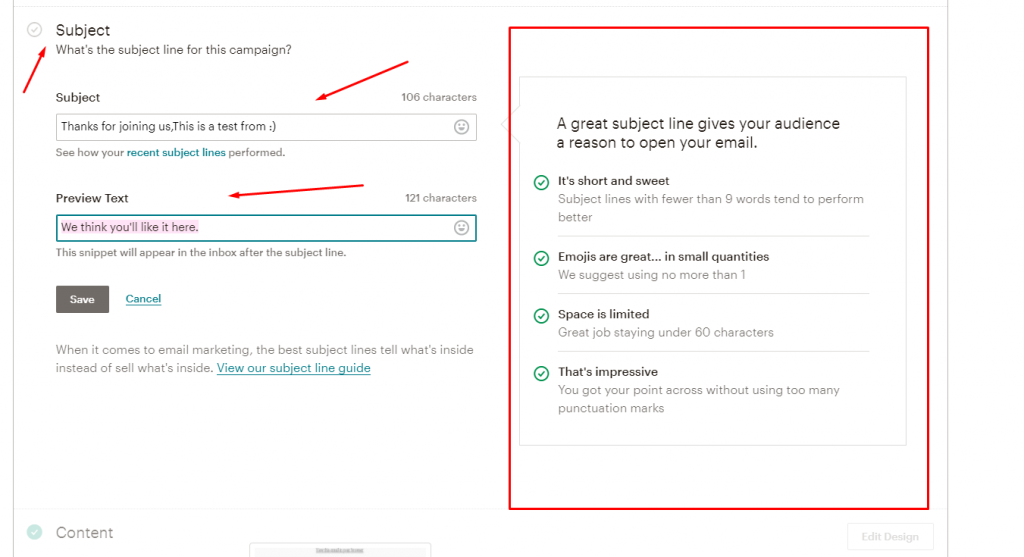
For Subject, make sure to follow the instructions on the right
The last thing is the content or the body of your autoresponder email, make sure to make it in a good design and a good content to get your subscriber attention, you can drag any item from the right and drop it in the left
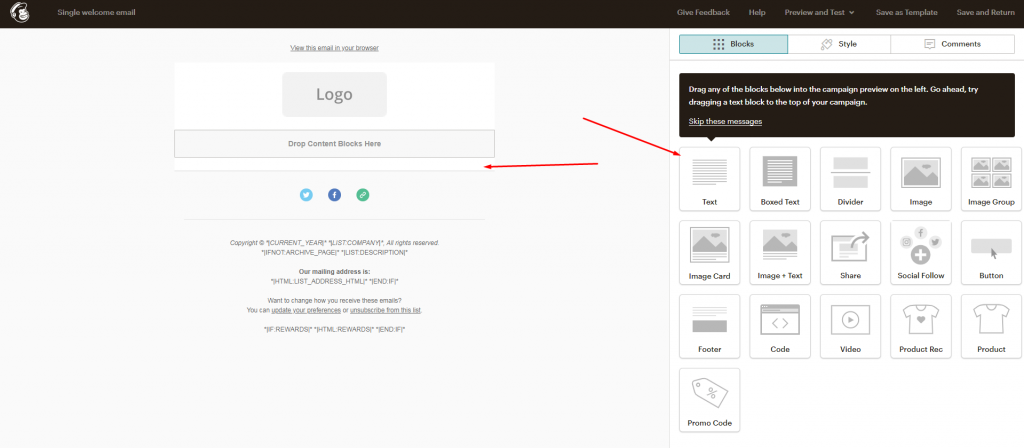
I made a one for testing purpose, you can also change the font size of the text and text color, you can customize anything as you want
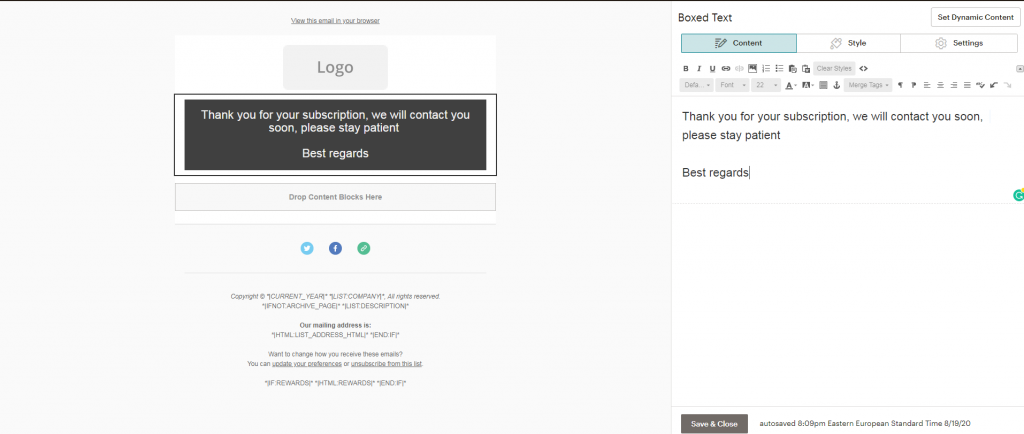
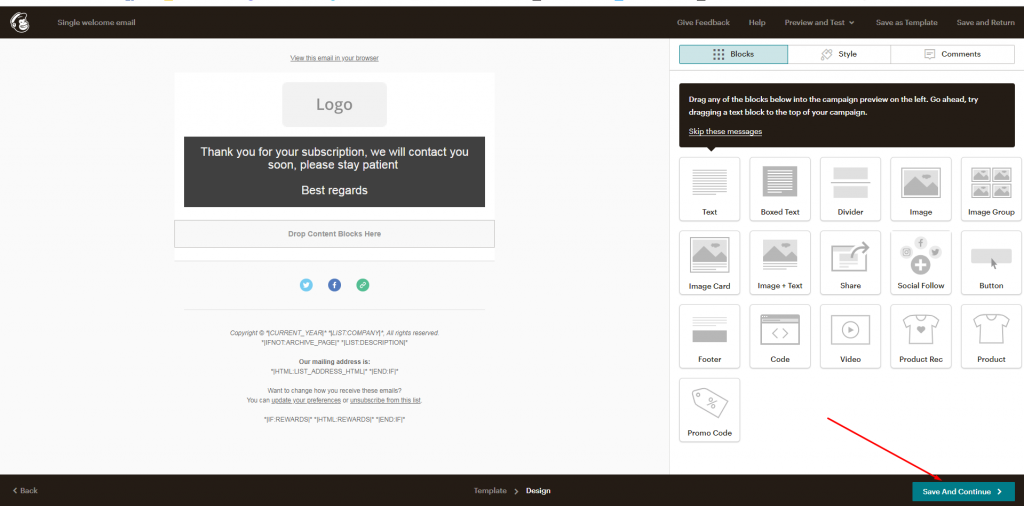
After that press save and continue in the lower right corner
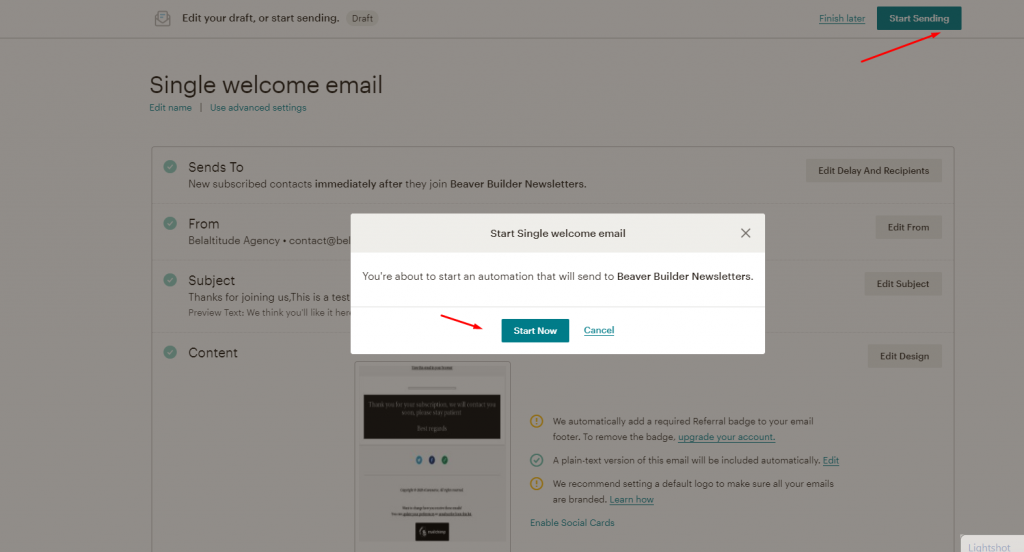
Then press start sending and then start now
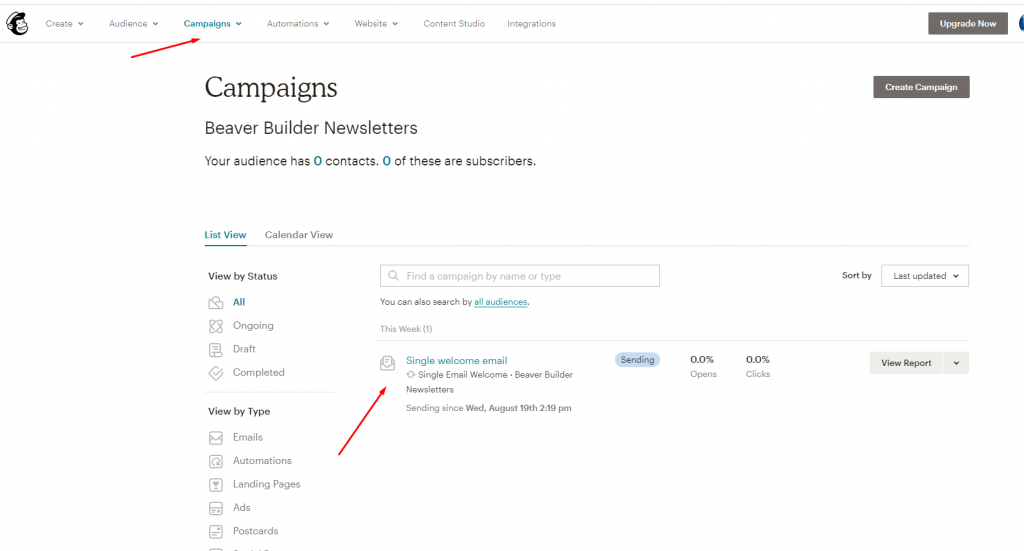
now you should see it active under Campaigns tab
Creating a subscription form with beaver builder:
Next, we create the subscription form in our website using beaver builder, visit your website, turn into editing mode and then, search for subscription form under modules

drag it in any place you want and then press it to edit.
under General, press services and make sure to select Mailchimp

then give it an account name, To connect Mailchimp to beaver builder, copy and paste Your API that we have created before ( Remember when I told you to put it in a safe place as we will need later, now it’s the time 🙂 )
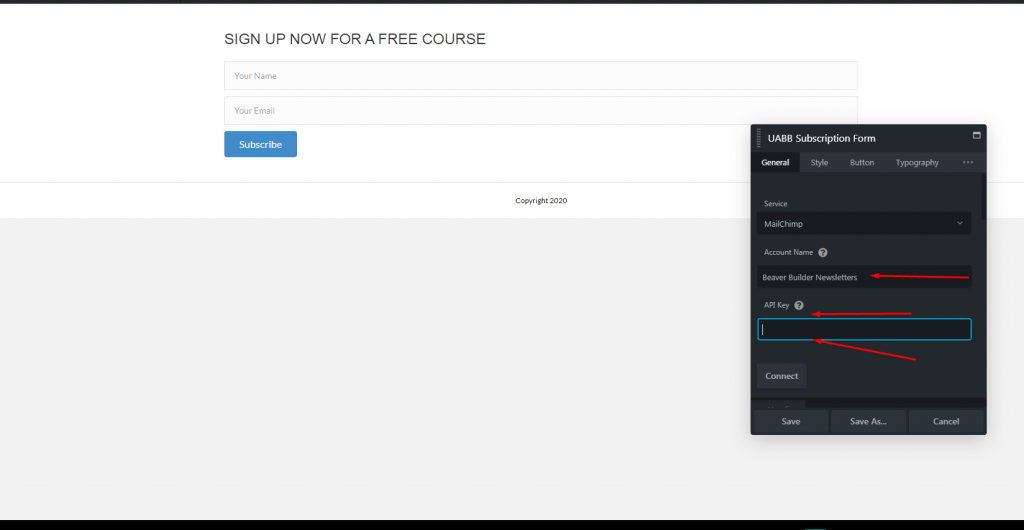
Put your API Key and then press Connect , The contact list should appear after that, choose it and then press save

you can customize other options in the form as you want like its style and its look, this is up to you, Now let’s test it to see if it will or not
Time to Test:
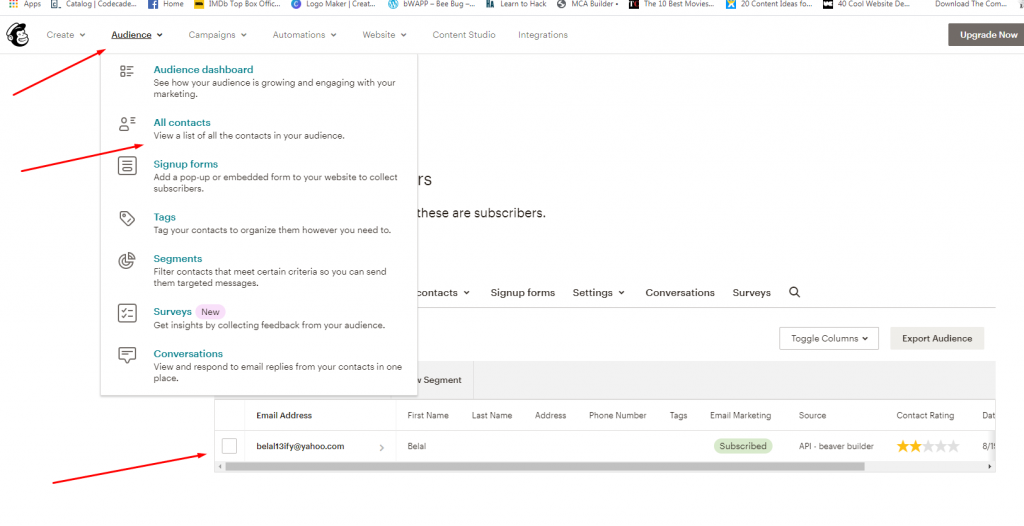
I am going to subscribe in it with one of my emails and I will check in Mailchimp if this email is added to the list or not, then I will check I will get the Autoresponder message to my subscribed email


From inside Mailchimp
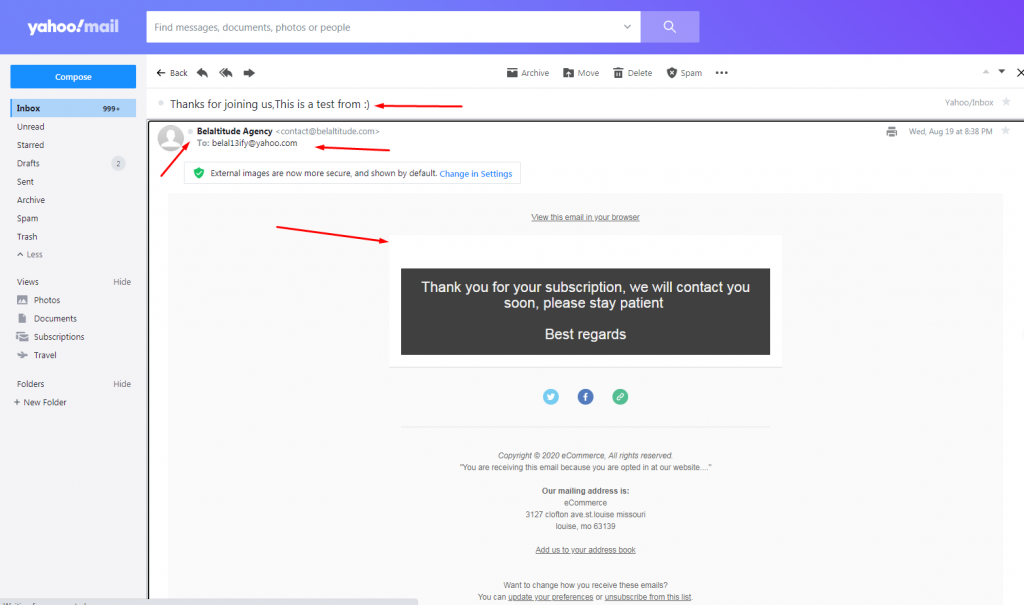
As you can see it, I have received the autoresponder email successfully in my inbox
As you can see it’s easy to connect beaver builder subscription form with Mailchimp contact list and to do an autoresponder.
Useful Links:
- How to create a custom sticky header on scroll with Beaver Themer?
- How to secure your WordPress website and protect it from hackers?
- How to create a beaver builder subscription form and link it with Mailchimp autoresponder?
- How to Create a multi language website with Beaver Builder and Polylang Plugin
- How to Create a custom menu using Beaver Builder
Is it possible to adapt these instructions to do the same but with another autoresponder? If yes do you think it is easy?
If it is not possible, why?
If it is possible but not easy, what should be taken care of with high attention, mainly?
Hello Jean, Thank you for passing by 🙂
yes, it’s possible and easy, if you are using another autoresponder like Aweber, you can simply Get the API key from your Aweber account and just replace it instead of the Mailchimp API key, buy choosing Aweber service from the subscription form, Let us know which Autoresponder you are referring to.
Best